“1 minute ” to learn, to know, to understand, to see
Welcome to our educational video series “1 minute”.
During 60 seconds we will show you step by step all popular and interesting protocols that can enhance your practice.


All restoration technique you may learn on our Hands-on module 2 course
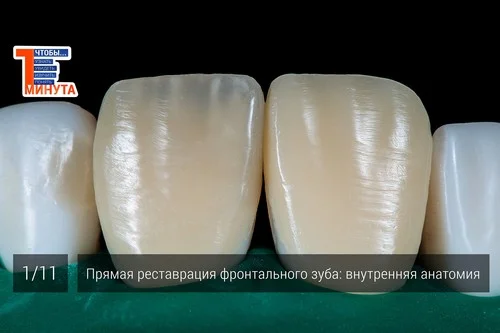
Direct anterior restoration: internal anatomy.
After built-up of interproximal wall we begin to restore dentin core. Dentin composite is used for this stage utilizing the shade that was selected during planning. It is very important to recreate proper type of tooth translucency during this step and to define optimal thickness between enamel and dentin. Excess of material is removed according to chosen scheme. The ratio between enamel and dentin can be controlled by modeling instrument (Missura, LM Arte) or perio probe. After this we can start to create internal anatomy. Dentin layer has to be divided into mamelons. For better artistry tips of mamelons can be splitted and formed with different length. This technique is very sensitive to the type of composite. It has to keep form, to have good plasticity, to have perfect adaptation to surface and to have optimal opacity. Filtek Ultimate, 3M ESPE passed this test perfectly. After light curing it is time for effects. Using white tint, we can enhance brightness to mamelons and imitate hypercalcification, if it is needed. Ochre tint can be utilized to increase chromacity. Remember, each tint has to be light cured separately before using another one! If there is a case of high translucency type we may highlight this feature by using transparent composite between mamelons (СЕ Filtek Ultimate, 3M in this case). After light curing there should be stage of enamel restoration and correction of proximal contact.
That’s all. Don’t forget to share this video!


